Having a brand-new PC build with no display can be a frustrating experience for any computer enthusiast. Figuring out what might be causing the issue and how to resolve it can seem like a daunting task.
In this blog post, we will check out the common reasons why a new PC build may not display anything on the monitor and provide you with essential troubleshooting steps to help you get your system up and running smoothly.
Whether you are a seasoned computer builder or a novice, this article will equip you with the knowledge and tools you need to tackle this problem head-on. So, let’s jump right in and get your new PC up and running in no time!
How To Fix New PC Build No Display Problem?
The process of building your own PC is exciting, and it allows you to customize your rig according to your specific needs. However, sometimes things don’t go as planned, and you may encounter the dreaded “no display” problem. But fear not! In this blog post, we will guide you through a few steps to diagnose and potentially resolve this problem, ensuring that you can start enjoying your new PC in no time. Here are some simple steps you can follow to solve the New PC Build No Display problem.
Check Monitor Connection
A poor display connection between your video output and monitor cable can sometimes result in the “No Display Error”. A monitor can be connected to your computer using VGA, HDMI, DisplayPort or DVI ports. Find out which port you use in your graphics card or your motherboard and try to re-plug the wire into that relevant port.
Moreover, there are chances that a new motherboard or graphics card show up with a bad video output port. So, see if there are any other video ports available in your motherboard or graphics card and try plugging in them.
Sometimes, an old or worn-out monitor cable can cause no display on your monitor. If you are using an old monitor, it is likely that the cable is also old and may have become damaged over time. This can happen due to excessive bending, twisting, or exposure to heat.
If you think your monitor cable may be the problem, you can try replacing it with a new one. You can purchase a new monitor cable from most electronics retailers. Once you have a new cable, simply disconnect the old cable from your monitor and the graphics card, and then connect the new cable.
Check Your RAM
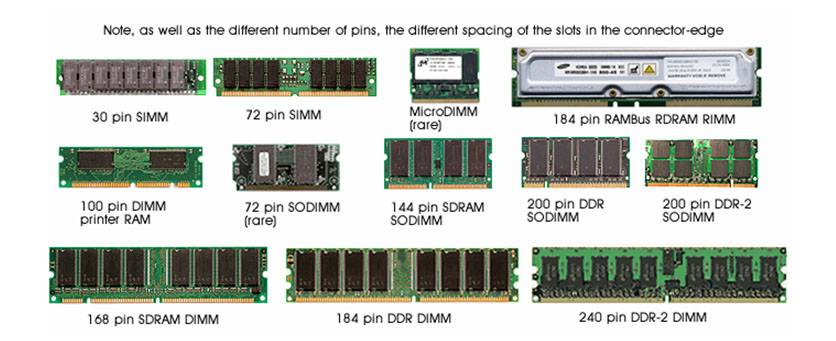
In some cases, no display issues can be caused by RAM problems. This can happen if the RAM is not properly seated on the motherboard, or if it is incompatible with the motherboard.
To troubleshoot RAM issues, you can follow these steps:
- Check the RAM seating :
Make sure that the RAM is seated correctly in the motherboard. You can do this by gently pressing down on the RAM until it clicks into place. - Try different RAM slots:
If the RAM is seated correctly, move it to different RAM slots on the motherboard. This will help you identify whether the RAM is faulty or the motherboard. - Use compatible RAM:
Make sure that the RAM you are using is compatible with the motherboard. You can check the motherboard’s specifications to see what type of RAM is supported. - Test the RAM
You can test the RAM using a memory diagnostic tool. This tool will check the RAM for errors.
Replace CMOS Battery
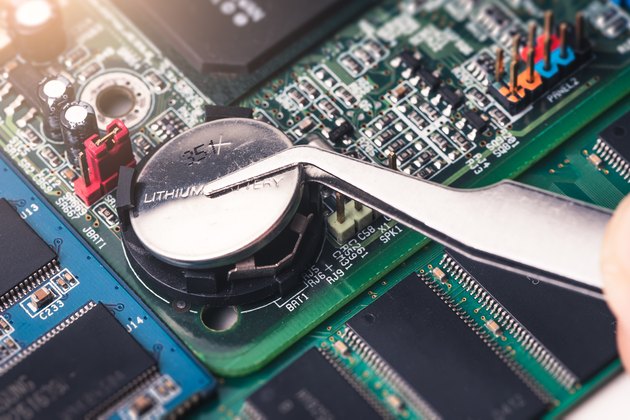
What is CMOS Battery?
The CMOS battery is a small battery that provides power to the BIOS (Basic Input/Output System) chip on your computer’s motherboard. The BIOS chip stores important settings, such as the date and time, the boot order, and the hardware configuration.
The CMOS battery is a small battery that provides power to the CMOS chip on your computer’s motherboard. The CMOS chip stores important settings, such as the date and time, the boot order, and the hardware configuration.
If the CMOS battery dies, your computer may not be able to boot up properly, or it may lose the date and time settings. In some cases, the computer may not even turn on at all.
If you are having no display issues with your new PC, one of the possible causes is a dead or malfunctioning CMOS battery. The CMOS battery is responsible for providing power to the BIOS chip, which stores the settings for your computer’s hardware. If the CMOS battery dies, the BIOS chip will lose its power and your computer will not be able to boot up properly.
CPU Not Seated Properly
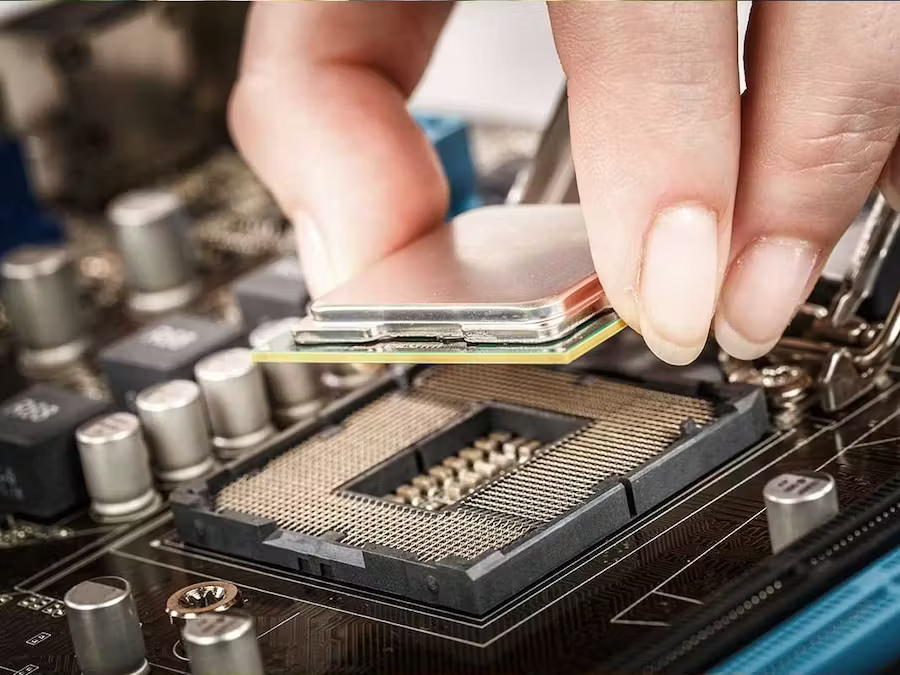
One of the most common causes of no-display issues is an improperly installed CPU. When installing a CPU into the socket, it is important to make sure that the notch on the CPU matches the notch on the motherboard. If the notch is not aligned properly, the CPU will not be able to seat properly and your computer will not boot.
It is also important to not apply too much pressure when seating the CPU. If you apply too much pressure, you may bend the CPU pins, which can damage the CPU and the motherboard.
If you are having no display issues, one of the first things you should check is the CPU installation. Make sure that the CPU is properly seated in the socket and that the notch is aligned correctly. If the CPU is not seated properly, you will not be able to boot your computer.
Check Graphics Card
First, ensure that the graphics card is properly seated in its slot on the motherboard. Sometimes, it can become loose during transportation or installation. Gently pressing down on the card can help secure it in place.
Additionally, make sure that the power cables connected to the graphics card are firmly attached and provide sufficient power. A loose cable can cause display issues too. Finally, ensure that the graphics card drivers are up to date. A simple online search for the latest drivers for your specific card model can help you install any necessary updates.
Some motherboards have integrated graphics, which are graphics cards soldered onto the motherboard. These integrated graphics can be used to display output from the computer, even if there is no dedicated graphics card installed.
However, if you have a dedicated graphics card installed, you may want to disable the integrated graphics. This is because the motherboard may prioritize the integrated graphics over the dedicated graphics, which can cause problems with display output.
How to disable integrated graphics?
- To disable the integrated graphics, you will need to enter the BIOS. The BIOS is a firmware that controls the basic functions of the computer.
- Once you are in the BIOS, you will need to find the setting for the integrated graphics. This setting may be called “iGPU” or “Integrated Graphics.”
- Once you have found the setting, you will need to disable it. You can do this by setting the value to “Disabled” or “Off.”
- Once you have disabled the integrated graphics, you will need to save the BIOS settings and exit.
- After you have exited the BIOS, you should be able to use the dedicated graphics card to display output from the computer.
Check Your Power Supply
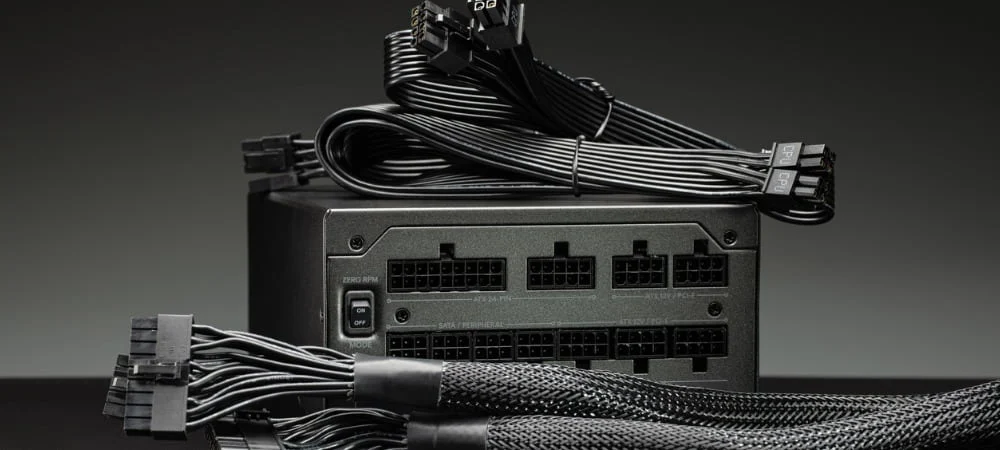
If you’re facing a non-responsive monitor while building your computer, it could be due to a power supply problem with your graphics card. Sometimes, when people build their first computer, they often overlook the concept of “Power Consumption”.
Check out Coolermaster’s handy app : Power Supply Calculator
The power supply unit (PSU) is one of the most important components in a computer. It provides the power that the other components need to function. If the PSU is not powerful enough, it can cause problems, such as no display issues.
When choosing a PSU, it is important to consider the power requirements of your other components. You can find the power requirements of your components in their specifications. Once you know the power requirements, you can choose a PSU that has enough wattage to meet those requirements.
If you are using power-hungry components, such as a high-end graphics card, you will need a PSU with a higher wattage. If you are not using power-hungry components, you can get away with a lower-wattage PSU.
It is also important to make sure that the PSU is compatible with your other components. You can find compatibility information in the PSU’s specifications. If you are having no display issues, one of the first things you should check is the PSU. Make sure that the PSU is powerful enough and that it is compatible with your other components.
To troubleshoot, ensure the power cables are securely connected to your graphics card. Sometimes, they can become loose during the installation process. Simply double-check the connections and make sure they’re snugly fitted in place. If everything seems fine, try using a different power supply cable to see if that resolves the issue.
Additionally, it’s crucial to ensure that your power supply unit (PSU) provides enough power to support your graphics card. Some high-performance cards require additional power connectors, so make sure all the necessary cables are connected properly. You may also want to check the wattage of your PSU to ensure it meets the requirements of your system.
Disassembling Hardware
One way to troubleshoot no display issues is to disassemble the hardware and see if that resolves the issue. This is a good option if you have tried all of the other troubleshooting steps and you are still having no display.
To disassemble the hardware, you will need to remove the following components:
- RAM sticks
- Storage devices
- DVD ROM, sound card, and related peripherals
- Dedicated graphics card
- CPU cooler
- CPU itself
- CMOS battery
Once you have removed the components, you will need to reconnect them one at a time and restart your computer to see if that resolves the issue. If you can boot up your computer with a particular component removed, then that component is likely the cause of the no-display issue.
For example, if you can boot up your computer with the RAM sticks removed, then the RAM sticks are likely the cause of the no-display issue. In this case, you would need to replace the RAM sticks.
It is important to note that disassembling the hardware can be a risky process. If you are uncomfortable with disassembling hardware, you may want to contact a computer technician for assistance.
Here are some tips for disassembling hardware:
- Be careful not to damage any of the components.
- Make sure that you reconnect the components in the correct order.
- After reconnecting each component, test the computer to ensure no display issue is resolved.
By following these tips, you can help to ensure that you disassemble the hardware safely and effectively.
Update BIOS
Updating the BIOS is a last resort troubleshooting step for a newly built computer that is not turning on or has no display. However, it is important to note that updating the BIOS can be a risky process, and you should only attempt it if you have some basic knowledge of how to interact with the BIOS.
The reason updating the BIOS may help is that sometimes, your new CPU, GPU, or other hardware may not be fully compatible with your motherboard. Motherboard manufacturers regularly update the firmware or BIOS of their motherboards to improve performance and compatibility.
Before updating the BIOS, you should check to make sure that the component you intend to install on your motherboard is fully compatible with it. For example, you cannot install DDR4 RAM on a motherboard that only supports DDR3 RAM.
If you have determined that the component you intend to install is compatible with your motherboard, you can then proceed with updating the BIOS.
Here are some tips for updating the BIOS:
- Back up your BIOS before updating it.
- Follow the instructions carefully.
- Do not interrupt the update process.
How to update BIOS?
Step 1: Using the BIOS utility
Enter the BIOS utility during the boot process by pressing the appropriate key (usually displayed on the screen). Look for the “Backup BIOS” or “Save BIOS” option within the BIOS utility.
Step 2: Using a USB drive
Download the correct BIOS update file for your motherboard model and BIOS version from the manufacturer’s website. Copy the BIOS update file to a folder on your computer.
After downloading the BIOS update file, extract its contents to a folder on your computer.
Step 4: Enter the BIOS utility
Restart your computer and enter the BIOS utility during the boot process by pressing the appropriate key (typically displayed on the screen).
Step 5: Find the BIOS update option
Within the BIOS utility, navigate to the “Advanced” or “Tools” section to find the BIOS update option.
Step 6: Select the BIOS update file
Use the BIOS utility to select the BIOS update file that you previously extracted in step 3.
Step 7: Start the BIOS update process
Follow the instructions provided by the BIOS utility to initiate the BIOS update process. Once the BIOS update process is complete, your computer will automatically restart.
By following these steps, you’ll have successfully backed up your BIOS, which is essential in case anything goes wrong during the update process.
Important Note
If you have tried all of the troubleshooting steps listed here and you are still not getting any display, then there is a possibility that there is a problem with your motherboard. Even new motherboards can sometimes have bad capacitors or MOSFETs. If your motherboard is still under warranty, you can contact the manufacturer to request a replacement motherboard.
Conclusion
Finally, it is frustrating for even the most tech-savvy individuals to experience a new PC build without a display. It’s a perplexing problem that can baffle even the most tech-savvy individuals. If you know these quick fixes, you can become an expert at troubleshooting computer displays, unravelling the mystery of malfunctioning displays.
Remember, the journey of building and fixing a PC is a constant learning process, where obstacles and challenges should be embraced rather than discouraged. So, the next time you encounter a blank screen, dive deep into the potential solutions instead of feeling defeated and revel in the satisfaction of solving the puzzle.
After all, every problem is an opportunity to gain new knowledge and skills, ensuring that your PC-building journey is both exciting and rewarding.
